In this tutorial, I will show you how to “blacklist” or “whitelist” email using the spam filters found in cPanel. You can filter based on individual email addresses or entire domains.
The process only takes a minute, yet it will save you a lot of time and trouble when dealing with your email inbox.
Note that the kind of blacklisting we’re talking about here is done at the level of the individual recipient (that’s you). Not to be confused with email server blacklisting, which is a different topic.
Apache SpamAssassin is the most commonly used spam control in cPanel configurations. But the spam filtering application used in your cPanel account may differ. The instructions below should apply regardless of the spam filtering application you use.
What Does it Mean to Blacklist or Whitelist Email?
When you blacklist an email address, all email sent from that address is blocked from reaching your inbox. Alternately, whitelisting an email address allows email from that address to bypass spam filters.
Email from whitelisted addresses will show up in your inbox every time, regardless of the content.
If you consistently find email in a spam or junk folder that you want to land in your inbox, whitelisting the address is the answer.
If you receive unwanted email from an address or domain, and they don’t respond to unsubscribe requests, blacklisting will keep them out of your inbox.
How to Blacklist Email in cPanel
Log in to cPanel.
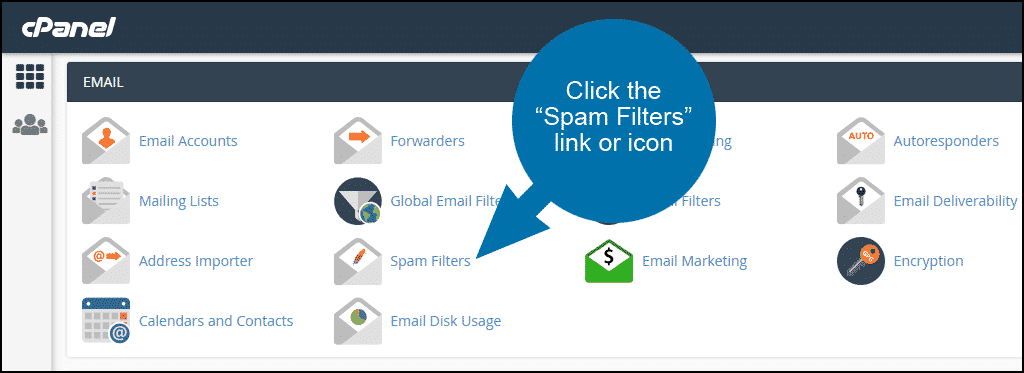
In the “Email” section, click the “Spam Filters” link or icon.
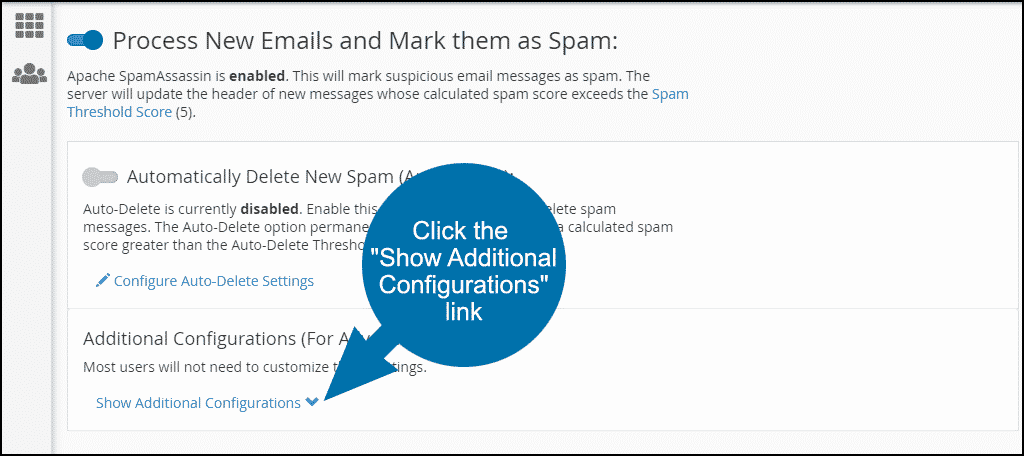
Scroll down to the “Additional Configurations (For Advanced Users)” section.
Click the “Show Additional Configurations” link.
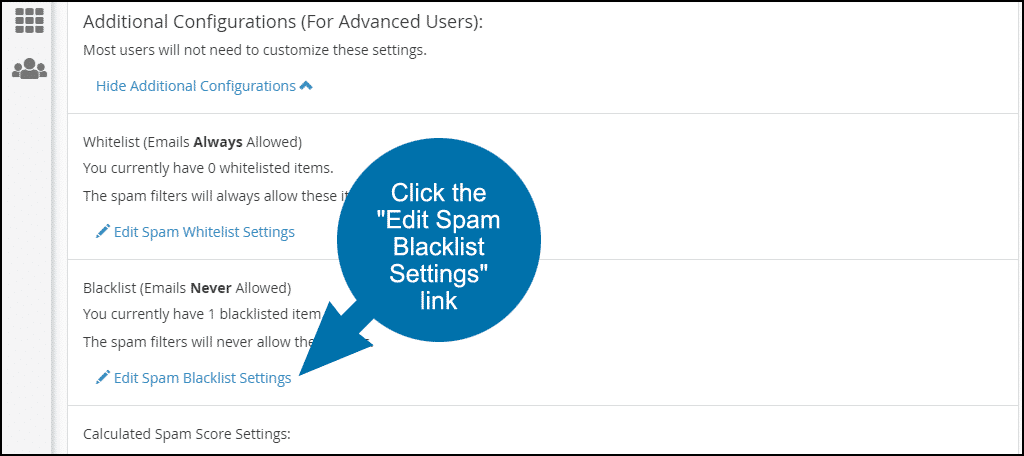
Scroll down to the “Blacklist (Emails Never Allowed)” section.
Click the “Edit Spam Blacklist Settings” link.
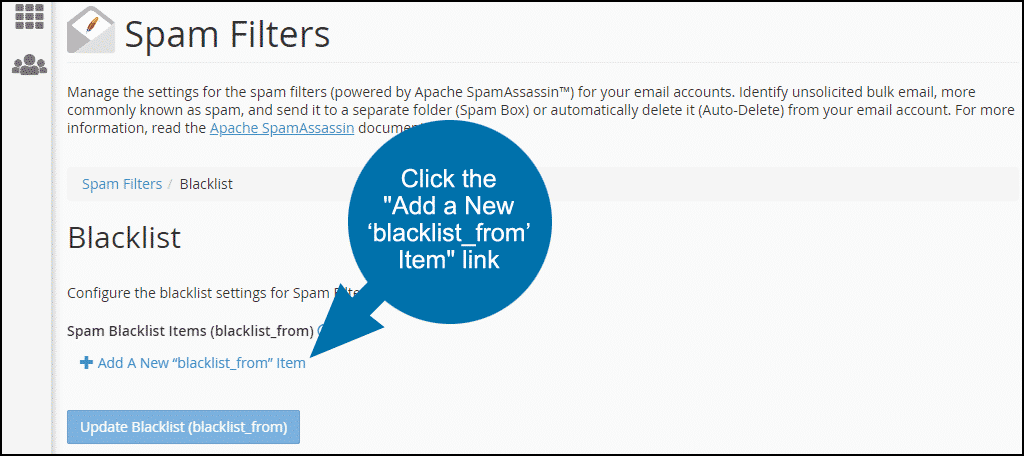
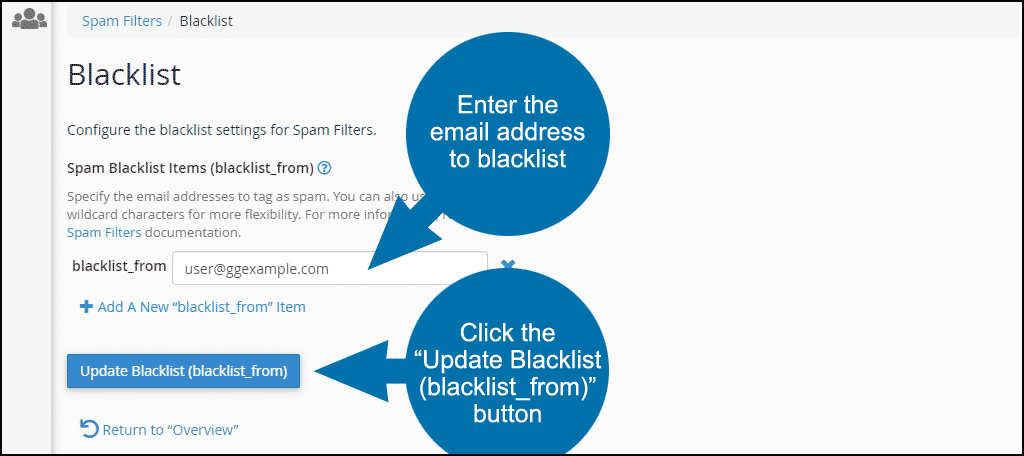
Click the “Add a New ‘blacklist_from’ Item” link.
When entering addresses, either to blacklist or whitelist, you can use the following options:
- user@ggexample.com — To whitelist a single email address.
- *@ggexample.com — To whitelist all of the addresses at ggexample.com.
- ?ser@ggexample.com — To whitelist a single character in an address at ggexample.com (i.e., user@ggexample.com, but not theuser@ggexample.com).
Enter the email address that you wish to blacklist.
Click the “Update Blacklist (blacklist_from)” button.
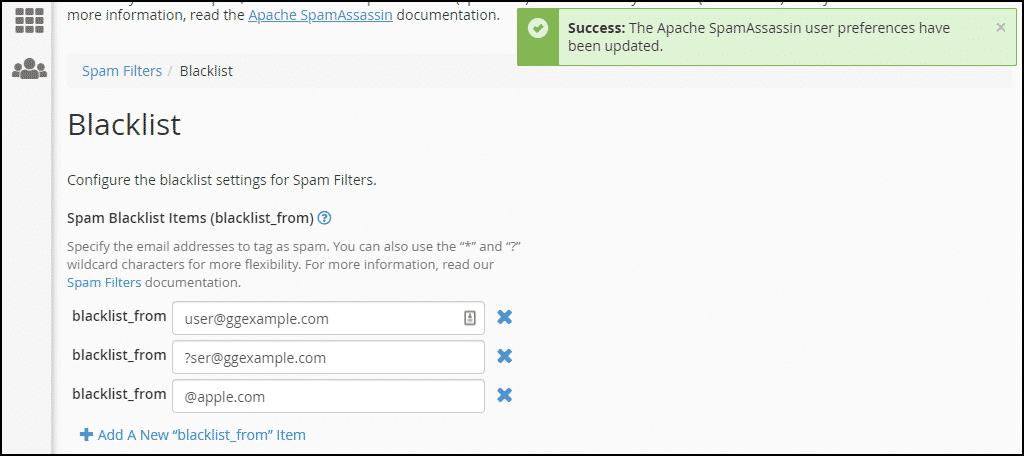
There is a success message, but otherwise, the cPanel interface can make it appear as if nothing has changed. That can be a bit confusing at first, but if you add more items you can see how the list is presented.
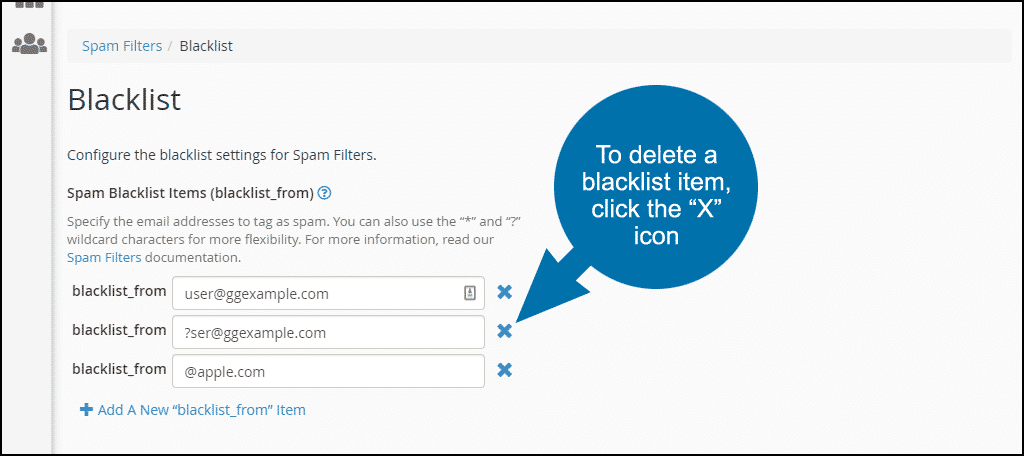
To delete a blacklist item, click the “X” icon next to the item you wish to delete.
How to Whitelist Email in cPanel
Whitelisting is done using the same steps for blacklisting shown above but in the “Whitelist (Emails Always Allowed)” section.
- Log in to cPanel. In the “Email” section, click the “Spam Filters” link or icon.
- Scroll down to the “Additional Configurations (For Advanced Users)” section. Click the “Show Additional Configurations” link.
- Scroll down to the “Whitelist (Emails Always Allowed)” section. Click the “Edit Spam Whitelist Settings” link.
- Click the “Add a New ‘whitelist_from’ Item” link.
- Enter the email address that you wish to whitelist.
- Click the “Update Whitelist (whitelist_from)” button.
Keeping a Clean Inbox
Spam filtering has come a long way, but sometimes you still need the control that blacklisting and whitelisting can provide. Knowing how to blacklist or whitelist email in cPanel is a great tool to have at your disposal.
Do you use email blacklists or whitelists? If so, which do you block (or allow) more often: individual addresses or entire domains?

