Installation steps:
-
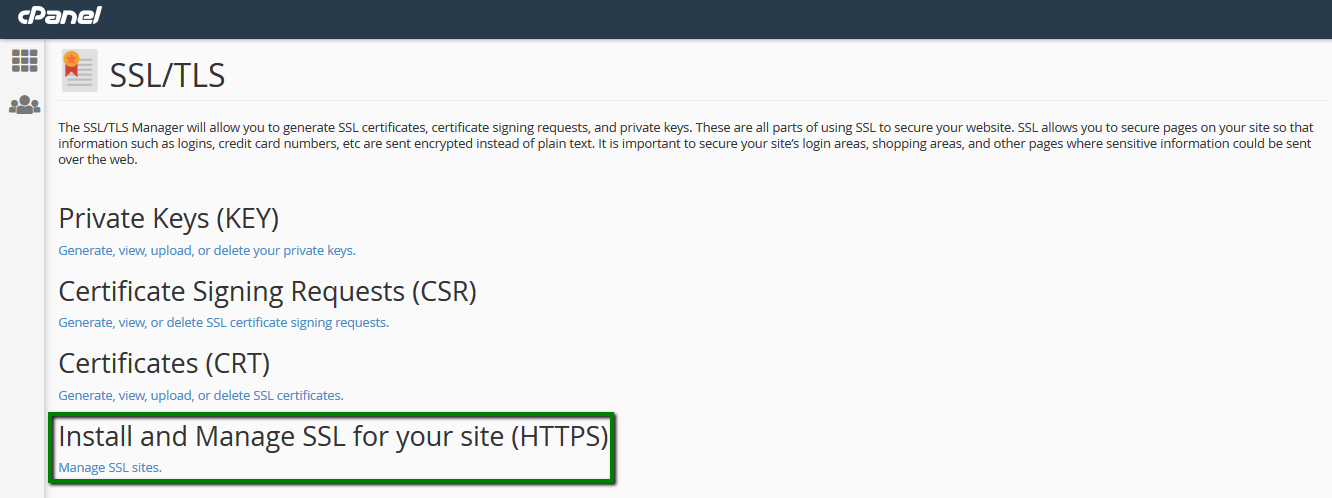
- Log into your cPanel account >> Security section >> SSL/TLS Manager menu.

- Under Install and Manage SSL for your site (HTTPS), click on Manage SSL sites.
Note: if this option is not available, it might mean that you don’t have the necessary admin rights for SSL installation. Contact your web host provider for assistance.
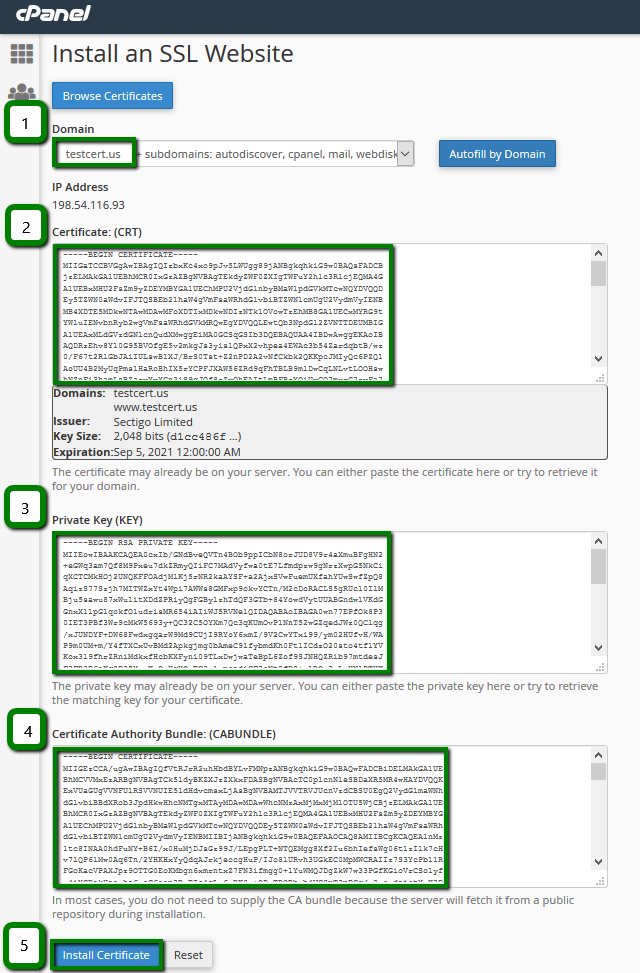
- Open the Certificate file using a text editor like Notepad. Copy the full text including the header and footer —–BEGIN CERTIFICATE—– and —–END CERTIFICATE—–. Paste these details into the Certificate: (CRT) box.
- Click on Autofill by Certificate to fetch the related Private Key. This should be stored on the same server where the CSR code was generated.If the CSR code and Private Key were not generated not on the same server you’re using for SSL Certificate installation, you can export the Private Key from the server it was created on. Paste it manually during SSL Certificate installation into the Private Key: (KEY) box.

- Now for installing the CA-Bundle file that was sent by the Certificate Authority along with the end-entity SSL Certificate issued for your domain name. The CA-Bundle file contains root and intermediate Certificates, which are needed to complete the end-entity Certificate chain. Even though it’s optional, we highly recommend installing it on the server along with the Certificate. The absence of the CA-Bundle could cause security warnings on mobile devices and some older browsers.You can find the CA-Bundle for your Certificate here.Even if the CA-Bundle contains several Certificates (root and intermediates), all of them need to be pasted into the Certificate Authority Bundle: (CABUNDLE) box during SSL Certificate installation using cPanel.
- Press the Install Certificate button.
- Log into your cPanel account >> Security section >> SSL/TLS Manager menu.
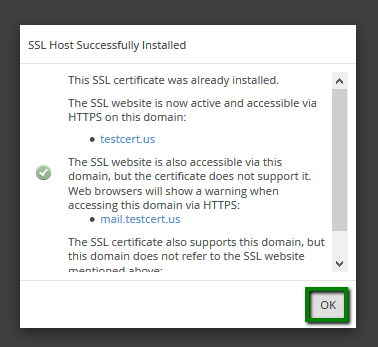
Job done! Your site and domain name are now secured.


